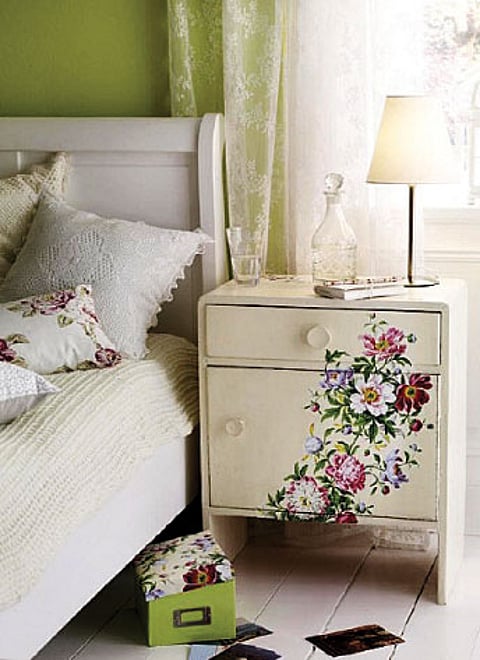
An old table that you’re bored with? A chair that’s seen better days? Or a tired old clock that’s been telling the time for years? Give them a new lease of life with an old French craft—decoupage. Derived from the verb decouper, which means “to cut out”, this is the art of decorating an object by pasting cutouts of patterned and coloured paper on it. Each layer is sealed with varnish (often in multiple coats) until the “pasted on” appearance disappears and the object looks as if it’s been painted or inlaid.
Actually, decoupage is just a fancy name for a simple craft. The process is quite easy and there is no great technique involved. We all know how to cut and paste and that’s exactly what this entails. Besides, you don’t even have to go hunting for supplies. You’ll find them lying around the house anyway—magazines, wrapping paper, old greeting cards, comic books, picture postcards, coloured photocopies and what’s more, even postage stamps. Once you get the hang of it, you can also graduate to dried and pressed leaves, laces and trims and anything else that is very thin and can be glued on.
Decoupage can be done on almost any surface. In theory, an entire house can be decorated with it—from the walls to furniture and most household objects. Not all surfaces, however, produce the same effect. Wood, particularly rough wood that has not been treated with varnish or wood sealers, is the ideal surface because the glue penetrates into its pores and creates perfect adhesion between the paper cuttings and the surface. Once you layer it with varnish, you will see that the paper seems to melt into the wood and there is no ostensible difference between the original wooden surface and the decoupaged one. Other materials that work for decoupage include aluminium, iron, steel, copper, stiff plastic, terracotta, ceramic and glass.
Besides a free-flowing imagination, all you need are long-blade scissors for cutting large sheets of paper, medium-sized scissors for curved surfaces, and manicure or embroidery scissors for small details. You will also need a cutter. There are some highly sophisticated ones with curved or adjustable blades but the most suitable one is a simple, narrow-blade cutter with interchangeable blades. It is important to cut away the used section of the blade frequently, so that it always stays sharp. Also, when using the cutter, ensure that you protect your work surface either with a wooden cutting board or a sheet of glass with the edges covered with sticky tape. Besides the scissors and cutter, you will also need vinyl glue, varnish, a regular paintbrush for applying glue and a thick one for varnish.
Start small, say with a wooden tray or an old cake tin. As practice makes you perfect, you will quickly progress to tables, chests and chairs. So go ahead, this is one DIY job that you and your children can complete over a weekend.
